#tutorial #docs #guide #automation
How to use the Try-it panel in published docs to let readers test your API without any setup
· 7 min read
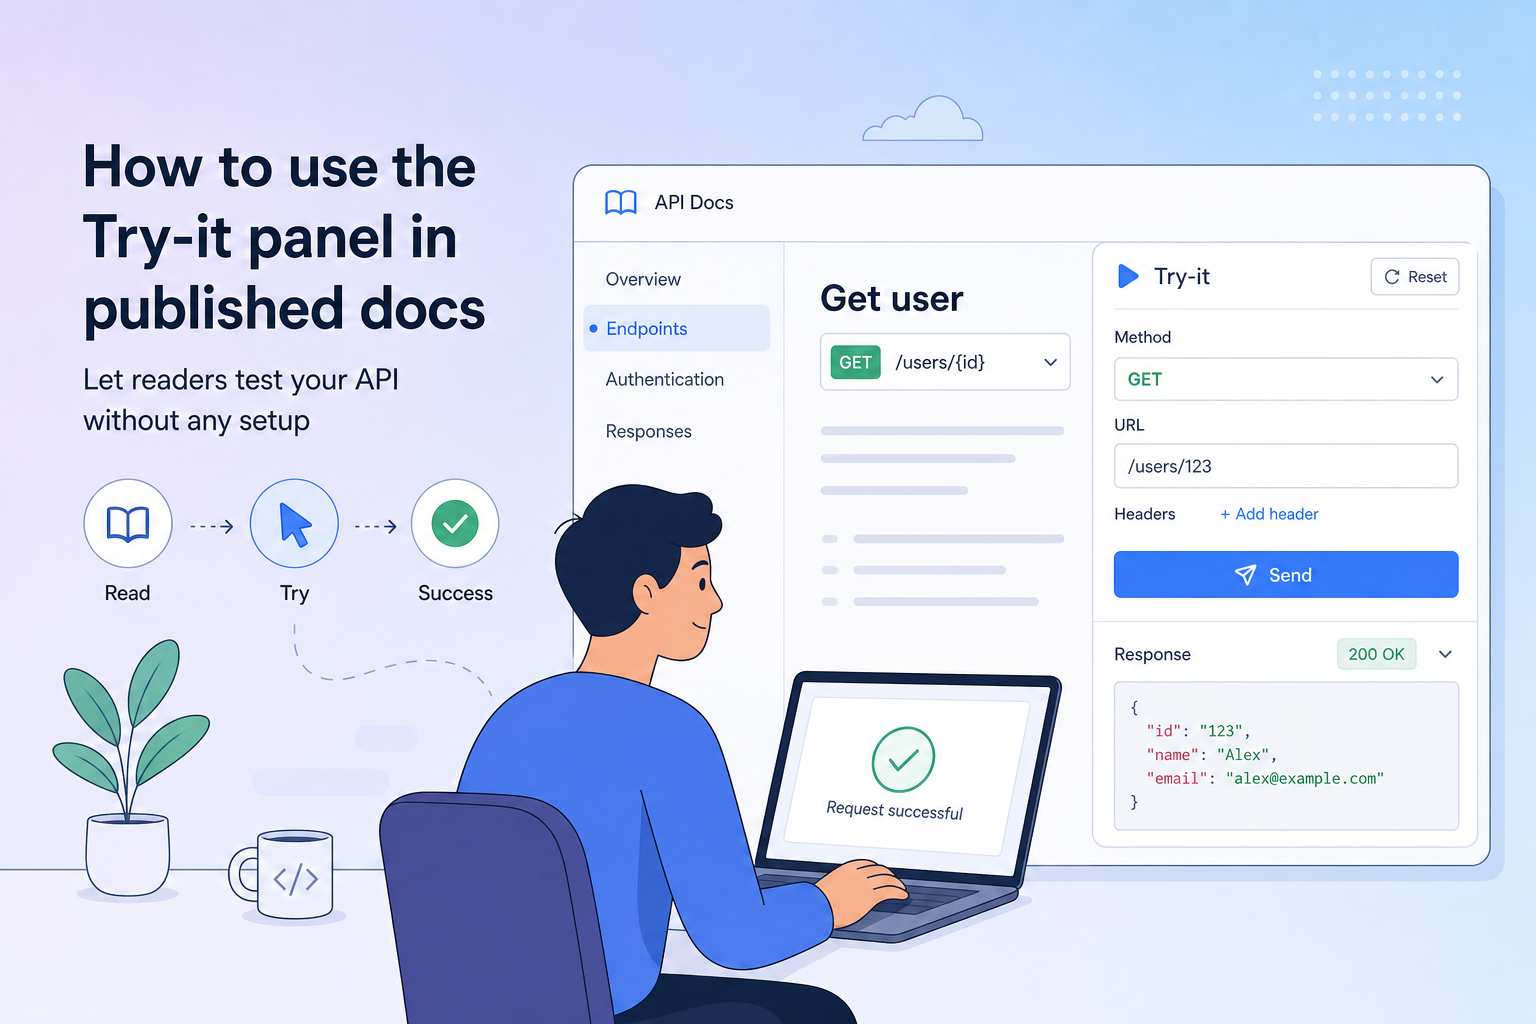
The Try-it panel in APIKumo's published Docs Sites lets readers call your API endpoints directly from the documentation page — no Postman, no curl, no local setup required. Here's how to configure it so your consumers go from reading to running in under a minute.
The biggest obstacle between a developer reading your docs and becoming an active user of your API is setup friction. They have to locate a client, configure auth, guess at the right request body, and fire off a request — all before they've seen a single successful response. The Try-it panel removes that obstacle entirely. Every published Docs Site on APIKumo ships a live, interactive panel alongside each endpoint page, so readers can make a real call without leaving the browser tab. This post walks through how the panel works, how your workspace configuration carries over into it, and the small authoring habits that make it genuinely useful for first-time callers. What the Try-it panel actually is When you publish a collection to a public Docs Site at , every saved request automatically becomes a docs page. That page includes the method, URL, parameter table, schema definitions, and the latest captured response — but it also includes a Try-it panel rendered right on the page. The panel is a stripped-down request editor. Readers can: - Review and edit query parameters and headers - Supply a request body using the same JSON/XML/text modes you used when building the request - Choose an environment (if you've exposed more than one) to swap base URLs or variable values - Hit Send and see the live response — status code, headers, and body — without installing anything Because the panel is driven by the same request definition you built in your workspace, it stays in sync automatically whenever you publish a new version. How environment-aware variables carry over In your workspace you write requests using placeholders — , , , and so on. When a reader opens the Try-it panel, those same placeholders resolve against the environment you've chosen to expose in the published collection. In practice this means you can publish a Staging environment with and a Production environment with . Readers pick one from the environment switcher and every URL in every panel updates instantly — no copy-pasting base URLs. A few things worth knowing: - Secrets stay secret. Variables that hold API keys or tokens are substituted at send-time on the reader's side, not embedded in the page source. You control which variable values are pre-filled and which are left blank for the reader to supply. - Readers can override values. If you leave blank in the published environment, the reader is prompted to enter their own key. It's scoped to their session and never stored on our servers. - URLs never leak your private credentials. Because resolution happens at send-time, saving a request in your workspace with a real token doesn't mean that token appears in the published page. Auth processors in the published panel This is where the Try-it panel genuinely separates itself from a static "copy this curl" block. Any pre-processors you've attached to a request — Bearer-from-env, HMAC signing, Base64 encoding, timestamp + nonce injection — run in the panel exactly as they run in your workspace. For example, if your API requires an HMAC-signed header derived from the request body and a secret key, you can attach the HMAC pre-processor in your workspace: When a reader clicks Send in the Try-it panel, the processor fires, computes the signature from their session's variable values, injects the header, and sends the request. The reader never has to understand the signing algorithm — they just fill in once and everything works. The same applies to post-processors. If you have a token-extraction step that reads a token out of a login response and stores it as , readers who run the login endpoint first will have that token available for subsequent calls in the same session. Chain auth → list → delete works for your readers just as it does for you in the workspace. Writing schema examples that make the panel useful The single highest-leverage thing you can do for first-time callers is write good examples in your schema definitions. The Try-it panel pre-fills the request body editor from the examples you provide, so a reader can send a valid request with zero editing if your example is realistic. In the schema editor, fill in the example field for every property — not just the type and description: | Field | Type | Example | |---|---|---| | | string | | | | integer | | | | string | | | | string | | A few authoring rules that pay off: - Use realistic values, not placeholders. teaches the reader the ID format. teaches them nothing. - Match your enums exactly. If only accepts ISO 4217 codes, list the most common ones so the reader knows will fail but will succeed. - Keep required fields minimal in examples. Show the smallest body that produces a successful response, then use the description field to document optional extensions. Readers are more likely to try a short body. - Pair a success example with an error example. Adding a response schema with a realistic error body sets reader expectations and makes debugging faster when they mis-fill a field. Choosing the right visibility mode Not every API should have a fully public Try-it panel. APIKumo gives you three visibility modes for your Docs Site: - Closed — only you (the owner) can see the site. Use this while you're still drafting. - Open — anyone with the link can read and use the Try-it panel. Good for public APIs, open-source projects, or developer-relations content where you want zero friction. - Restricted — only allowlisted email addresses can access the site after signing in. Use this for partner APIs, beta programs, or internal tooling where you need to control who can call production endpoints. For most API producers launching a public product, Open is the right default. Pair it with a staging environment as the pre-filled option so exploratory calls from unknown readers don't hit your production database. Per-endpoint permalinks and sharing Every endpoint in a published Docs Site has its own permalink — a stable URL that survives version updates. When a reader finds the page and wants to share it with a colleague, they copy the permalink and the colleague lands directly on that page, Try-it panel included. This makes the panel a support tool as well as a discovery tool. Instead of writing a lengthy Slack message explaining how to reproduce a bug, your team can say: "Open this link, switch to the Staging environment, paste your , and hit Send." Permalinks are also how the and OpenAPI exports hook in — the same subdomain serves both human-readable docs and machine-readable formats, so AI agents and CI pipelines can reach your API surface without additional configuration. A quick checklist before you publish Before you flip your Docs Site to Open, run through this list: 1. Environments configured. At minimum a Staging environment with set. Production is optional — only expose it if you're comfortable with exploratory traffic. 2. Auth processors attached. If your API requires signed headers or a bearer token, add the relevant pre-processor so readers don't have to reverse-engineer the auth scheme. 3. Schema examples filled in. Every request body property has a realistic example value, not a type label. 4. Sensitive variables left blank. Keys or secrets readers must supply themselves should be blank in the published environment, not pre-filled with your own credentials. 5. Response schemas documented. At least a and one error shape, so the Try-it panel can annotate the response the reader receives. 6. Visibility mode set. Closed → Open (or Restricted) only when the above are done. Reducing time-to-first-call is a product decision Documentation that lets readers stay in one tab, click Send, and see a real response in under a minute isn't just a convenience feature — it's a measurable reduction in the activation energy between "evaluating your API" and "integrating your API." The Try-it panel handles the mechanics; your job is to feed it good variable definitions, realistic schema examples, and the right auth processors. Do those three things and the panel does the rest. If you haven't published a Docs Site yet, you can do it in a few minutes: open any collection, hit Publish , pick a subdomain, and choose a visibility mode. Your first Try-it-enabled docs page is one click away — no card required while APIKumo is in preview.