Maintaining an OpenAPI spec and actually testing against it are two workflows that rarely stay in sync. The spec drifts, the Postman collection drifts, and the docs page becomes a third source of truth nobody fully trusts. Importing your OpenAPI 3 or Swagger 2.0 file into APIKumo collapses those three artifacts into one workspace — live requests, structured schemas, and auto-generated docs all derived from the same source. Here is a precise account of what the importer maps, what it leaves for you to fill in, and which follow-up steps return the most value for the least effort.
How to import
From any workspace, open the Import dialog and choose OpenAPI 3.x / Swagger 2.0. You can upload a .yaml or .json file, or paste the raw text directly. The importer accepts both formats without any conversion step on your side.
The result is a new collection whose name is taken from the info.title field of your spec. Everything else flows from there.
What gets mapped automatically
Understanding the mapping precisely saves you from re-entering data that is already there and helps you spot the gaps that need attention.
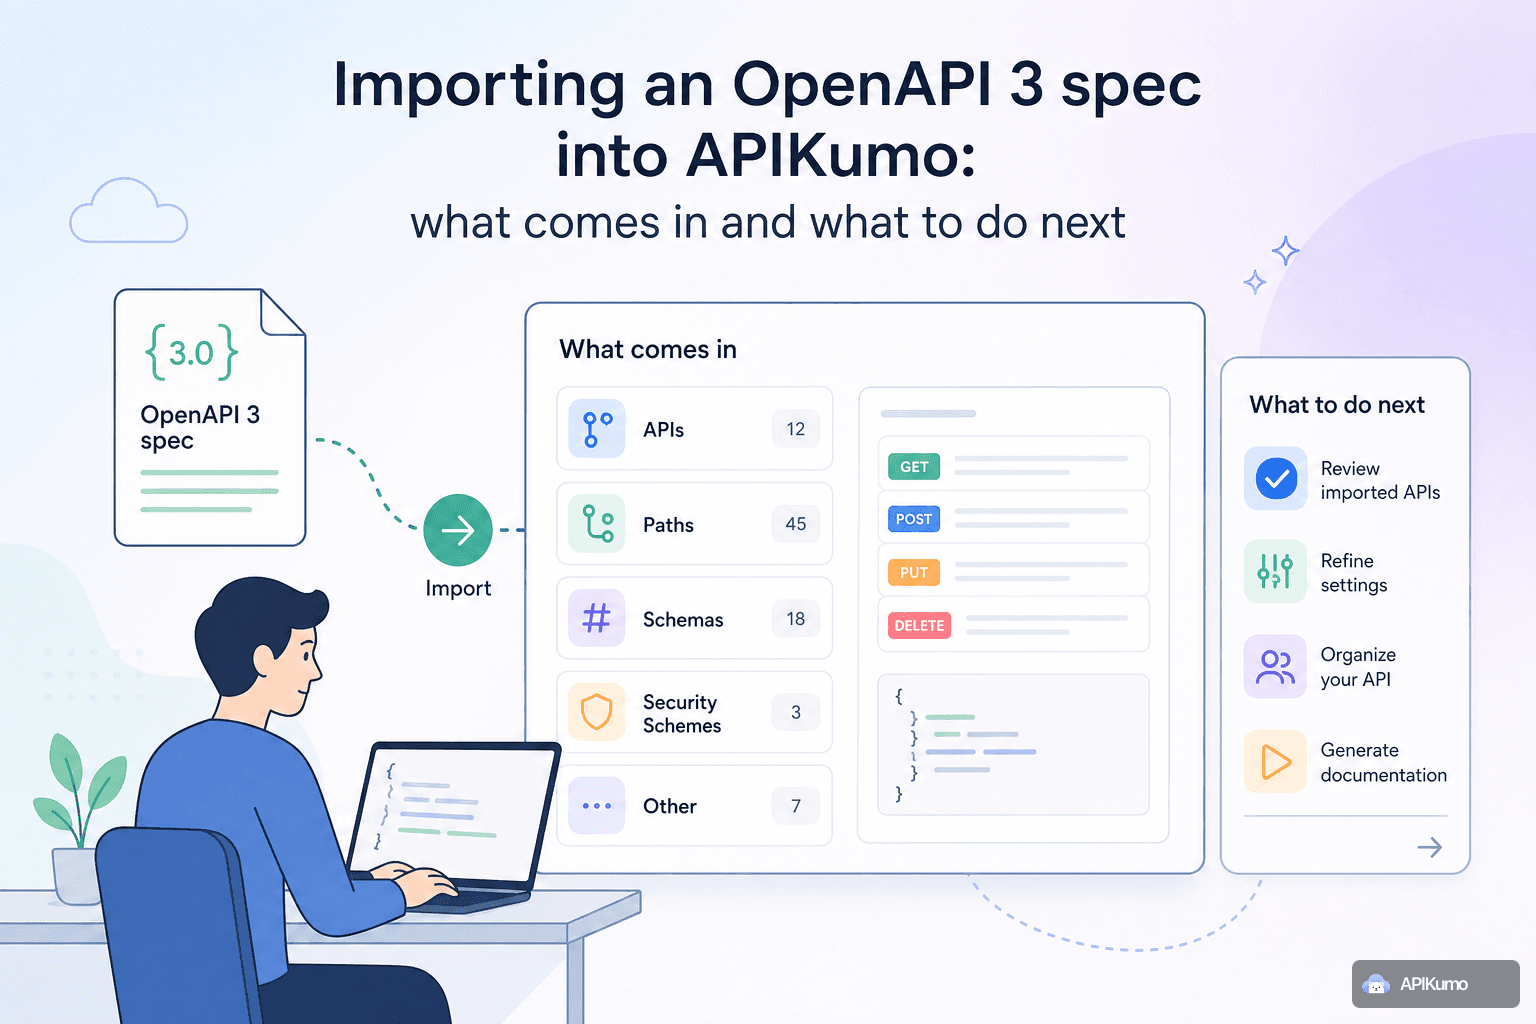
Paths and operations — every paths entry becomes a saved request. The HTTP method, full URL (including the servers[0].url base), and operation summary are all carried over. Operations are grouped into nested folders that mirror your spec's tags.
Query parameters and path parameters — parameters defined at the path or operation level are imported with their names, whether they are required, and any description text. Path parameters appear in the URL as {param} placeholders, which you can immediately replace with {{variable}} references once you attach an environment.
Request body and content type — if an operation defines a requestBody, the importer sets the correct body mode (JSON, XML, text, etc.) and populates the body editor with a skeleton derived from the example or schema field, whichever is present. A JSON body with an inline example lands ready to send with only the dynamic values left to edit.
Response schemas — response shapes defined under responses are imported as structured schemas and surface directly in the auto-generated docs page for each endpoint. Field names, types, enums, and any inline examples all come through.
Security schemes — securitySchemes of type http (Bearer or Basic) and apiKey map to the corresponding auth modes in the request editor. OAuth 2.0 schemes are noted in the collection but require you to configure the token endpoint manually, since token acquisition involves runtime credentials that cannot live in a static file.
Descriptions — info.description, operation-level description and summary fields, and parameter descriptions are all preserved and appear in the generated docs.
What the importer leaves for you
No import tool can know things a spec does not express. A few common gaps to expect:
- Real example values. Specs often use
"string"or0as schema examples. You will want to replace these with representative values before sending requests. - OAuth token acquisition. As noted above, dynamic auth flows need a pre-processor or a dedicated auth request chained to your collection.
- Environment-specific base URLs. A spec has one
serversentry; your team likely has three (local, staging, production). This is exactly the kind of thing environments are for. - Pagination and multi-step flows. A spec describes individual operations; it does not describe the order in which to call them or what to extract from one response to feed the next.
Step 1: attach environments
The single highest-return action after import is replacing hard-coded values with {{variable}} references and defining an environment for each target.
Create three environments — Local, Staging, and Production — each with at minimum a base_url variable and any credentials your API requires:
# Staging environment
base_url   = https://api-staging.example.com
api_key    = sk_staging_••••••••
Then edit the base URL on your imported requests to read {{base_url}}. Because variables resolve at send-time, your saved requests never contain a real secret, and switching from staging to production is a single click in the environment selector.
If your spec already used servers variables, the importer will have introduced {{variable}}-style placeholders in the URL — check those first before creating new ones.
Step 2: layer in pre-processors for auth
If your API uses Bearer tokens that expire, a pre-processor keeps things automatic. Add a Bearer-from-env pre-processor to any request (or to the collection root if you want it applied everywhere) and point it at your {{access_token}} variable.
For APIs that require HMAC signing or a timestamp-plus-nonce scheme, the HMAC signing and timestamp + nonce pre-processors handle both without custom code. For anything more bespoke, the custom JS sandbox pre-processor gives you full control:
// Pre-processor: build a signed Authorization header
const ts = Math.floor(Date.now() / 1000).toString();
const payload = ts + request.method + request.path;
const sig = hmacSHA256(payload, env.get('signing_secret'));
request.headers.set('Authorization', `HMAC ts=${ts},sig=${sig}`);
Once the pre-processor is in place, every request in that collection sends with a fresh, correctly signed header — no manual copy-paste between a terminal and the editor.
Step 3: chain requests with post-processors
OpenAPI specs describe resources in isolation, but real test flows are sequential: authenticate, then list resources, then act on a specific one. Post-processors bridge those steps.
After your login or token request, add a JSONPath extract post-processor:
JSONPath:  $.data.token
Save to:   {{access_token}}
Now every subsequent request that uses {{access_token}} in its auth configuration picks up the live token automatically. You can chain as many steps as you need — extract an ID from a POST /orders response and feed it directly into GET /orders/{{order_id}}.
Step 4: publish the auto-generated docs site
Once your collection is tidy and your schemas are accurate, publishing takes about thirty seconds.
Open the Publish panel, choose a subdomain (your-team.apikumo.com), and set visibility:
- Open — anyone with the link can read and try the docs.
- Restricted — only allowlisted email addresses can access them after signing in.
- Closed — owner-only, useful while you are still drafting.
Every saved request becomes its own docs page automatically — method badge, URL, parameters, request and response schemas, and a Try-it panel so readers can call your endpoints directly from the page. The schemas you imported (and any you have edited since) appear inline, so documentation and implementation stay in sync as long as you keep the collection updated.
For teams integrating with AI tooling, the same subdomain exposes llms.txt, a Markdown export, and an OpenAPI 3 export at stable URLs — useful for feeding an AI agent or code generator without any additional setup.
Keeping the spec and the collection in sync over time
Importing once solves today's problem; drift is the long-term risk. A few practices help:
- Re-import on breaking changes. When your spec adds or removes endpoints, re-importing creates a new collection you can diff against the old one before replacing it.
- Use versions and changelogs. Snapshot the current collection before you start editing a new API version. Readers of your published docs site will see a structured changelog when you ship the next version.
- Export back to OpenAPI. If you make schema improvements inside APIKumo, use the OpenAPI 3 export to push those changes back into your spec repository, keeping both artifacts honest.
Summary
Importing an OpenAPI 3 or Swagger 2.0 spec gives you a populated collection — paths, parameters, body skeletons, response schemas, and auth configuration — in one step. The gaps the importer cannot fill (real credentials, multi-environment base URLs, token-acquisition flows, and chained test scenarios) are exactly what environments, pre-processors, and post-processors are designed to handle. Layer those in, publish the docs site, and you have moved from a static contract file to a living, testable, shareable API workspace without rewriting anything from scratch.