#tutorial #automation #deep-dive #guide
How to chain requests in APIKumo: auth, list, and delete in one workflow
· 6 min read
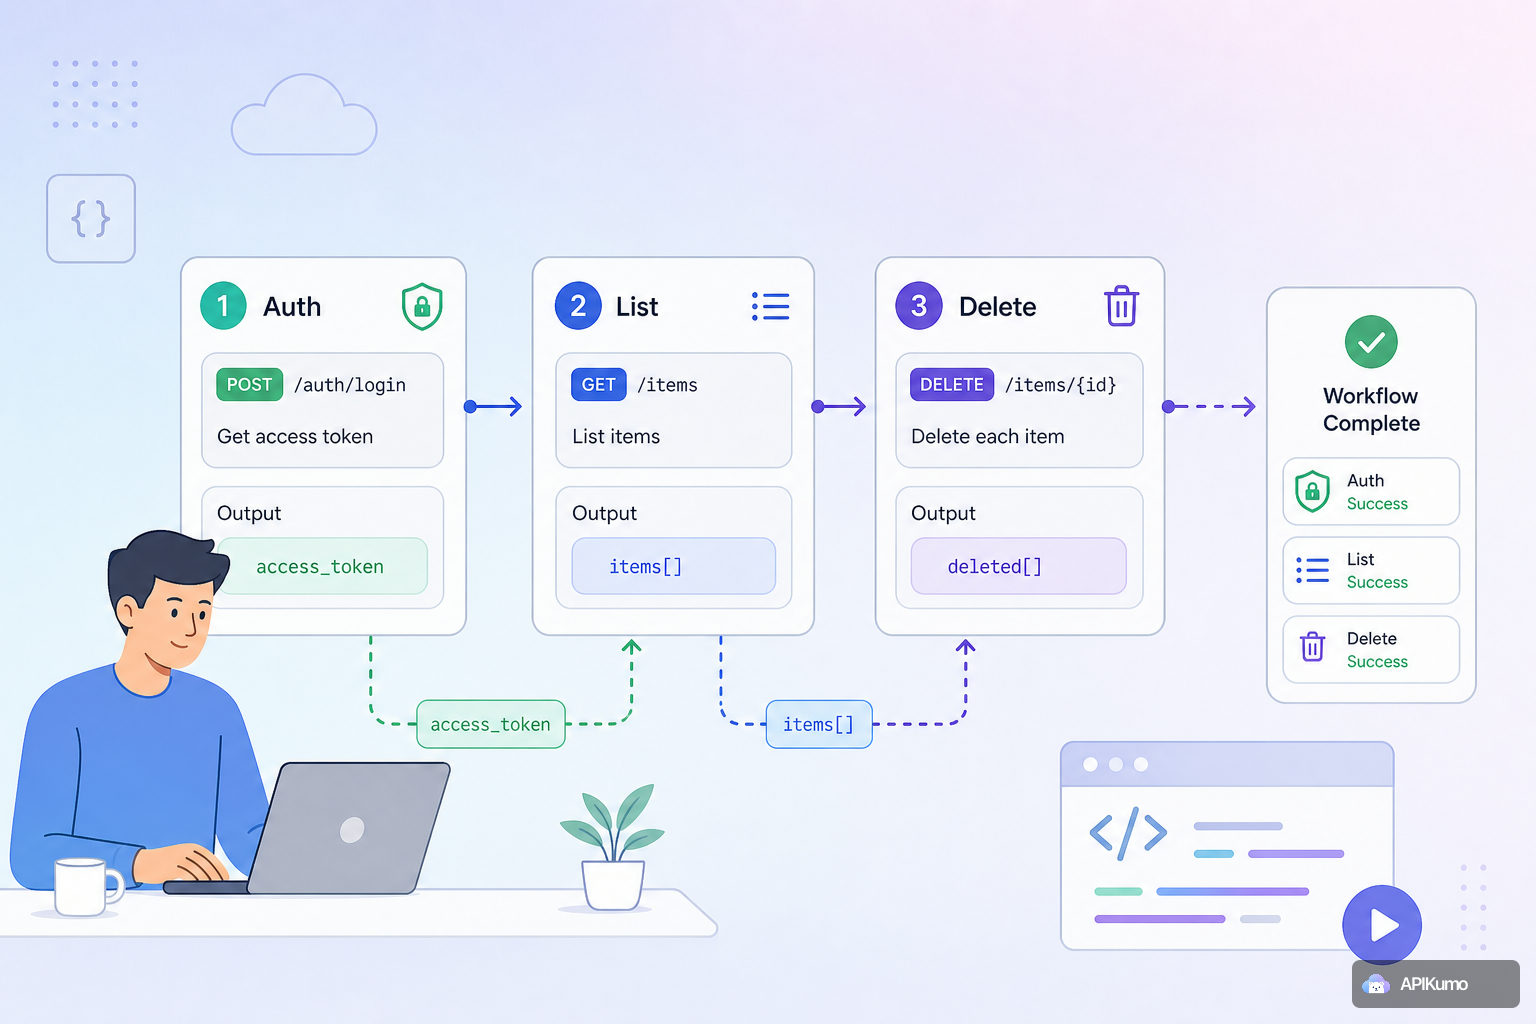
Stop copying tokens between tabs. This guide shows you how to use APIKumo's post-processor variable extraction to chain an auth request, a list call, and a delete call into a single seamless workflow.
If you've ever tested a multi-step API flow manually, you know the drill: log in, copy the token from the response, paste it into the Authorization header of the next request, run the list endpoint to find a resource ID, copy that too, paste it into the delete URL, fire the request, and repeat the whole thing every time the token expires. It works, but it's slow and error-prone. APIKumo's pre- and post-processors exist precisely to eliminate that loop. This guide walks through a complete example — auth → list → delete — showing how each request feeds the next without you touching the keyboard in between. How variable chaining works The core idea is straightforward: a post-processor on one request can extract a value from the response and write it into an environment variable. The next request reads that variable via substitution at send-time. Because variables resolve at send-time rather than at save-time, your saved requests never contain raw secrets — just placeholder references. The three processor types you'll use most for chaining are: - JSONPath extraction — pull a field out of a JSON response body. - Regex extraction — match a pattern anywhere in the body or a header value. - Header extraction — grab a specific response header (e.g. or ) directly. Once extracted, the value lives in your active environment for the rest of the session. Step 1 — Set up your environment Before writing any requests, create an environment to hold the values that will flow between steps. Open the Environments panel and add three variables to your Staging (or Local ) environment: | Variable | Initial value | Purpose | |---|---|---| | | | Shared base for all requests | | | (leave blank) | Populated by the login post-processor | | | (leave blank) | Populated by the list post-processor | Leaving and blank is intentional — the processors will fill them in at runtime. The environment switch at the top of the workspace lets you flip between Local, Staging, and Production with one click, so the same chained collection works against any environment. Step 2 — The login request and token extraction Create a request called Login inside a collection folder. Now open the Post-processors tab for this request and add a JSONPath extraction step: - JSONPath : - Save to variable : When the request succeeds, APIKumo evaluates the JSONPath against the response body and writes the result into in the active environment. Add a second post-processor — an Assert status step set to — so the chain stops loudly if authentication fails instead of silently propagating an empty token. Step 3 — The list request and ID extraction Create a request called List Items in the same folder. Because was just written to the environment in the previous step, this request picks it up automatically — no manual pasting required. Add a JSONPath extraction post-processor to capture the ID of the first item in the response: - JSONPath : - Save to variable : If your API returns a different shape — say, an array at the root — adjust the path accordingly: . You can verify the extracted value by adding a Log to console post-processor immediately after; the console panel will show the resolved value alongside the response. Step 4 — The delete request Create a request called Delete Item . Both and were captured by the previous two post-processors and are now live in the environment. This request needs no extra configuration — just send it. Optionally, add an Assert status post-processor expecting (or , depending on your API) so you get an explicit failure signal if the delete doesn't go through cleanly. Step 5 — Running the chain You can run the three requests in sequence manually by opening each tab and pressing Send — the variables pass between them automatically. For a tighter loop, keep all three requests open in separate tabs and work through them top to bottom. The Cmd/Ctrl+K palette lets you jump to any saved request by name, so navigating the chain is fast. A few things to keep in mind: 1. Order matters. Post-processors on the Login request must run before the List request fires, and List must run before Delete. The processors are synchronous and blocking — APIKumo won't move to the next step in a processor chain until the current one finishes. 2. Environment scope. Variables written by a post-processor are scoped to the active environment. If you switch from Staging to Production mid-chain, the values written against Staging won't carry over — which is exactly the isolation you want. 3. Secrets stay out of saved requests. Because is a blank placeholder at save-time, it never ends up committed to a shared collection with a real credential inside it. Going further with pre-processors Post-processors handle extraction, but pre-processors let you shape the request before it goes out. A few patterns that compose well with the chain above: - Bearer-from-env : If your login endpoint needs its own auth header (e.g. a client-credentials flow), use the built-in pre-processor to inject before the Login request fires — keeping the full auth flow variable-driven end to end. - Timestamp + nonce : Some APIs require a signed timestamp on every request. Add a timestamp + nonce pre-processor to the List and Delete requests so the values are always fresh rather than stale from a previous copy-paste. - Conditional skip : If is empty (because the list returned no results), a conditional skip pre-processor on the Delete request can abort it gracefully rather than sending a malformed URL. Sharing the workflow with your team Once the collection is working, you can publish it as a Docs Site on your subdomain. Every saved request — Login, List Items, Delete Item — becomes a docs page automatically, with method, URL, parameters, and the latest response visible to readers. The Try-it panel inside the published docs is environment-aware: readers who open the page can fire the requests against your API directly, with the same variable substitution and auth processors you configured. Set the visibility to Restricted to limit access to allowlisted emails, so only your team can run live calls. If you want AI agents or LLM-based tooling to consume the workflow, the and OpenAPI 3 exports are available on the same subdomain with no extra configuration. Wrapping up The auth → list → delete pattern is one of the most common multi-step flows in API testing, and it's a good template for anything more complex: create → read → update → delete, paginate → aggregate, or webhook registration → trigger → verify. The building blocks are the same in every case — a post-processor writes to a variable, the next request reads it via substitution, and the chain runs without manual intervention. If you haven't set up your environments yet, that's the best place to start. Once your , credentials, and placeholder variables are in place, the rest of the chain snaps together quickly.